CidnolaCall (626) 554-4516

Historic District Color Work, Pasadena

The Color Scheme Comes Before the Brush

On a house inside a landmark district, the paint job that goes wrong is almost never the paint. It is a scheme that was chosen at the store, applied over a weekend, and questioned afterwards.

  • Scheme drawings and sample boards
  • Palettes matched to the house
  • Two coats over a color change
Serving
Pasadena, CA (91101, 91103, 91104, 91105, 91106, 91107), Bungalow Heaven, Altadena, CA, and South Pasadena, CA

Next — About

02  About

Cidnola paints houses in Pasadena, and a large share of that work sits inside or beside a designated historic district. Bungalow Heaven is the one everybody names, but the same questions come up on any street where the houses were built before the war and somebody is now looking at three body colors, two trim colors and a front door.

The order of operations is what separates an easy repaint from a stalled one. Where a district has design guidelines, exterior color is often something the city wants to see described before the work happens, not after. That does not always mean a hearing and it does not always mean a long wait. It usually means somebody at the planning counter needs to understand what you are proposing and be able to picture it. A written scheme with real samples on the actual wall answers that faster than a paragraph of description ever will.

So we do the color work as a piece of work in its own right. We read whatever guidelines apply to your block, look at what the house already carries under the current coat, put sample boards up on the elevations where the light is worst, and hand you a scheme you can take to the counter. Then, once you know where you stand, we paint it. Craftsman bungalow, Spanish Revival stucco, shingle, board and batten: the prep changes with the substrate, but the sequence does not.

  • The guidelines vary block to block

    A landmark district, a landmark overlay and an ordinary street are three different situations. Before we quote color we find out which one your address is in, because it decides whether the scheme needs describing to anybody at all.

  • Sample boards beat paint chips

    A chip is two inches wide, held indoors, next to nothing. The same color on a two foot board, dry, hung on the north elevation and looked at again at four in the afternoon, is a different color. We do it that way because the sun here is not gentle.

  • What is already on the house is evidence

    Sanding back a protected spot on a rafter tail or under a porch eave often turns up the earlier scheme. It is not binding on anything, but it is the most useful reference point you will get, and it costs an hour.

03  Services

Getting a Scheme Drawn, Sampled and Approved

Color first, then the coating. Each of these is a real step with an output you can hold.

  • Historic Palette Research

    We look at the house itself, the period it was built in, and any published guidance for your district, then narrow to a short list of body, trim and accent combinations that suit the architecture rather than fighting it.

  • Sample Boards on the House

    Two coats of each candidate on rigid board, hung on the elevations that matter, left up for a few days. Morning light, afternoon light, and the way the deep overhang on a bungalow puts half the wall in permanent shade.

  • Scheme Documentation

    A written scheme naming each color, its manufacturer and code, and exactly which element it lands on: body, trim, sash, rafter tails, porch ceiling, front door. That sheet is what a reviewer actually needs.

  • Exterior Repainting

    Wash, scrape, sand, prime the bare spots, caulk the open joints, then two coats. On a color change it is two coats regardless of what the can claims, and we quote it that way from the start.

  • Trim, Sash and Door Work

    The details that carry a Craftsman elevation: exposed rafter tails, corbels, window sash, porch columns and the front door. Different sheen from the body, brushed rather than sprayed where the edge quality shows.

  • Interior Color and Plaster Prep

    Older Pasadena houses have plaster, not drywall. It takes patching and priming differently, and it shows every flaw a high sheen can find, so the sheen choice is part of the color choice indoors.

04  Service areas

Districts and Blocks We Paint

We work across Pasadena and the older neighborhoods around it, where the housing stock and the review questions are much the same.

Pasadena, CA (91101, 91103, 91104, 91105, 91106, 91107)/Bungalow Heaven/Altadena, CA/South Pasadena, CA/San Marino, CA/Sierra Madre, CA/La Canada Flintridge, CA/Eagle Rock, CA

Not sure whether your street sits inside a district? Call (626) 554-4516 with the address and we will look it up before you spend anything.

05  Pricing

What a Documented Color Scheme Costs

The color work and the painting are priced separately because they are separate jobs, and plenty of owners want the first without committing to the second yet. Exterior ranges below assume a single story bungalow of ordinary size in sound condition. Failing paint, bare wood and stucco cracks all move the number, and we will say so on the walk rather than after.

Scroll sideways to compare on a narrow screen.
ScopePriceIncluded
Exterior Repaint, Same Family$6,500 to $11,000
  • Full prep, two coats
  • Trim and sash brushed
Get a walkthrough
Exterior With a Color Change$8,500 to $16,000
  • Scheme work included
  • Two coats over the old color
Call now

06  FAQ

Questions About Approvals and Palettes

Do I need permission to repaint my house?
It depends entirely on where the house is. Outside a designated district, ordinary repainting is normally just repainting. Inside one, exterior color can fall under the district's design guidelines, and the honest answer is that you should ask the city's planning counter about your specific address before you buy paint. It is a short conversation and it is free.
How long does the approval side usually take?
We will not give you a number, because it varies by city, by district and by how complete the submission is, and a figure we invented would be worse than no figure. What we can tell you is what makes it slow: a scheme described in words instead of colors, colors named without a manufacturer code, and no indication of which element gets which color. A documented scheme removes all three.
Am I limited to historic colors?
Usually the question is about compatibility with the house and the street rather than a fixed list. Period palettes exist and they are genuinely useful as a starting point, particularly for a Craftsman elevation, but the reviewer is generally looking at whether the scheme suits the building. That is a judgment, which is why samples on the wall carry more weight than a name on a card.
My house was built before 1978. Does that change the job?
Yes. Pre-1978 housing is assumed to have lead paint until testing says otherwise, and that changes how the surface is prepared: contained work areas, wet methods, no open dry sanding of old coatings, and proper clean-up at the end of each day. It adds time and cost. It is not optional and you should be suspicious of any quote that ignores it.
Why does the same color look wrong on my house?
Two reasons here in particular. Deep overhangs with exposed rafter tails keep a wide band of the wall in shade all day, so a color chosen in full sun reads much darker and colder up under the eave. And the light is harsh and warm on the south and west elevations, which lifts yellows and burns out the softer greys. Big samples, both sides of the house, two times of day.

07  Journal

Notes on Color and Approvals

What we have learned taking schemes to the counter and putting samples on old walls.

House Painting Prep: What Happens Before Any Colour Goes On

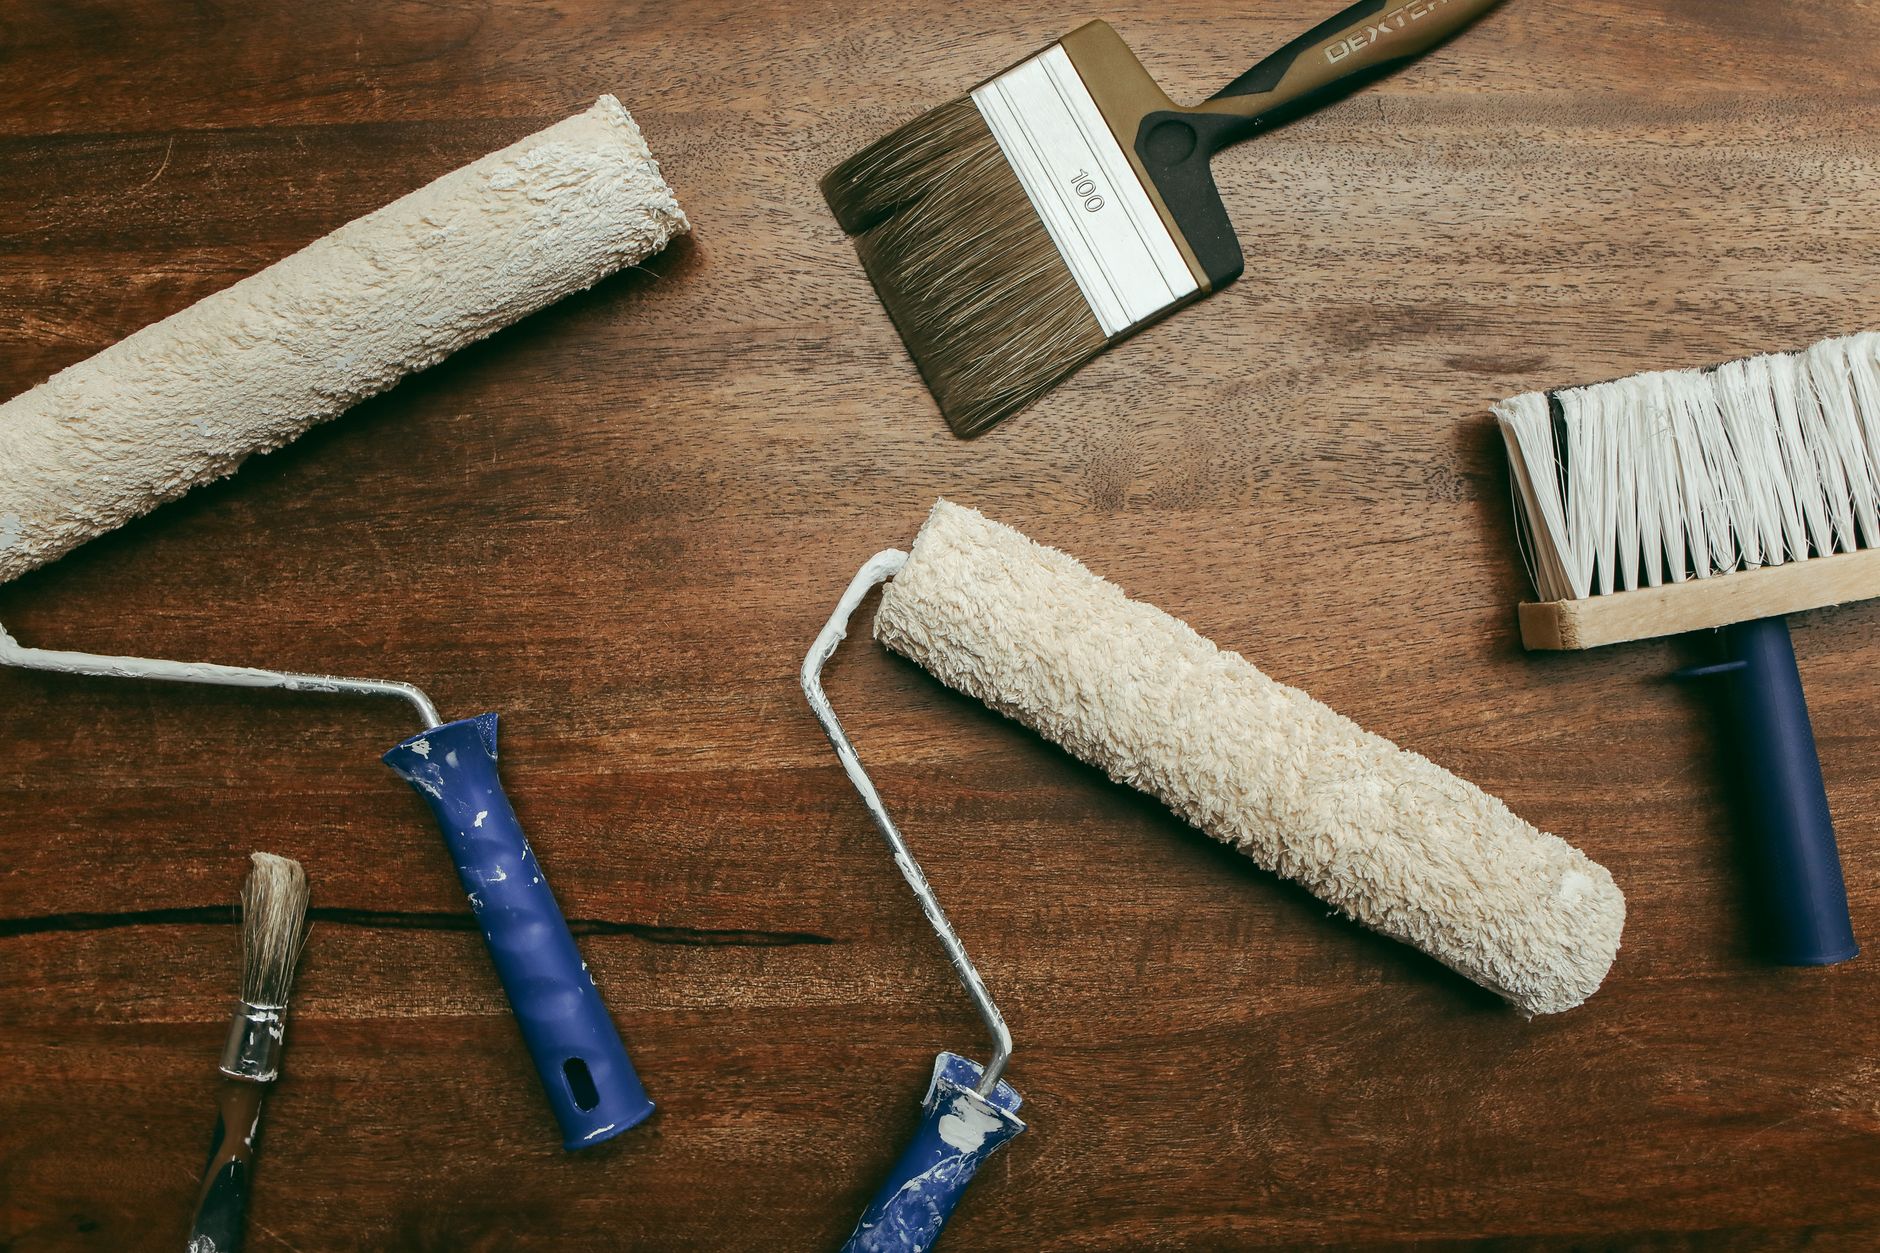
Top view of various painting tools including rollers and brushes laid out on a wooden surface in Pasadena, CA

Ask anyone who has repainted a house twice in six years what went wrong, and the answer is almost never the paint. It is what happened, or did not happen, in the two days before the paint arrived. Prep is unglamorous, it photographs badly, and it is the entire job.

This is a walk through that stage in the order it actually happens, and an honest account of what each step is protecting you from.

Why coatings fail early

A coating fails in one of three ways. It loses grip on the surface underneath and peels. It stays stuck but the surface behind it moves, cracks or rots, and the paint splits along with it. Or it holds fine and simply chalks and fades, which is the only one of the three that is really about the paint itself.

The first two are prep failures. That is the uncomfortable part. Adhesion is won or lost at the surface, which is why the choice of primer, and whether one is used at all, decides more about the outcome than the finish coat ever will. You can buy the most expensive product on the shelf and it will still lift off a chalky, dusty or damp surface, because adhesion is a property of the bond, not of the tin.

Washing, and why a hose is not washing

Exterior surfaces collect a fine film of dust, pollen, exhaust residue and, in shaded spots, mildew. None of it is visible from the ground. All of it sits between your new coating and the surface you want it to grip.

A proper wash means a detergent, agitation where the surface is dirty enough to need it, and a full rinse. Pressure washing is a tool, not a synonym for cleaning. Used carelessly it drives water behind siding and into gaps around trim, and then the surface is clean and soaked, which is worse than dirty and dry. If a surface has been pressure washed it needs time to give that water back before anything is applied over it.

Mildew deserves its own note. It is a living thing, and painting over it does not kill it. It grows through the new coating and reappears as dark staining within a season. It has to be treated and removed, not covered.

Scraping back to something sound

The rule is simple to say and tiring to apply: anything that can be removed with a scraper was going to come off eventually anyway, and it is better that it comes off now.

This is where a job’s real scope reveals itself. A wall that looked like it needed a freshen up turns out to have three failing patches, and each one has to be taken back to a firm edge. Feathering that edge matters more than most people expect. A hard step between old coating and bare substrate will telegraph through the finish and show as a visible ridge in raking light, even under two coats.

Repairs come before priming, always

Filling, caulking and any carpentry belong here, in the middle, and not at the end when someone notices a gap.

Caulk is the step that gets rushed most often. Its job is to close the joints where water would otherwise get behind the surface, particularly around trim, window casings and the seams where two materials meet. It is not a filler for wide gaps and it is not a substitute for a repair. Applied into a joint that is too wide, it skins over, shrinks and splits, and the split is now hidden under paint where nobody will see it until the damage is done.

The test for a repair is whether it is structurally sound and dry, not whether it looks acceptable. Filler over damp wood is a cosmetic answer to a moisture problem, and the moisture is still there afterwards.

Primer, and what it is actually for

This is the step most often skipped on the grounds that modern paints are self priming, and it is worth being precise about what is being skipped.

A primer does jobs that finish coats are not formulated to do. It bonds to a difficult or porous surface and gives the finish something consistent to grip. It seals a surface that would otherwise drink the first coat unevenly and leave patchy sheen. It blocks stains, tannins and old smoke or water marks that would bleed through and discolour the finish months later. And on bare or heavily patched areas it evens out absorbency, so that the finish coat dries to one appearance rather than a map of every repair underneath.

Self priming finishes are real and they are genuinely fine on a sound, previously painted, clean surface in good condition. What they are not is a solution for bare wood, bare masonry, chalky surfaces, big colour changes, or anywhere a stain needs blocking. Deciding which situation you are in is the actual skill, and getting it wrong is invisible on day one and obvious in year two.

Spot priming, meaning priming only the repaired and bare areas rather than the whole surface, is a legitimate middle path and is what most sound repaints call for. Whole surface priming is for when the substrate is bare, the existing coating is failing broadly, or the change in colour or product type demands it.

Masking is a quality decision, not a tidiness one

Masking looks like housekeeping and reads on the invoice as time. What it actually buys is edges.

A clean line between wall and trim, or between two colours, is the detail people notice from the pavement without knowing why the house looks well kept. Rushing that line produces the wobble that no amount of good paint fixes. The same applies to protecting glass, hardware, roofing, paths and planting: every minute not spent masking is spent later scraping paint off something it should never have touched.

Weather, and the numbers that matter

Coatings are formulated to cure within a temperature and humidity range, and the surface temperature is what counts, not the reading on a phone.

A wall in direct afternoon sun can be far hotter than the air around it, hot enough that the coating skins before it can level or bond properly. The same wall after sundown can drop below the minimum while it is still curing. That is why exterior work tends to chase the shade around a building through the day rather than starting on one side and marching around it.

Drying and curing are also not the same thing. Dry to the touch can happen in an hour. Cured, meaning the coating has reached its designed hardness and resistance, takes considerably longer, and a surface that is rained on or scrubbed inside that window will not recover the difference.

Two coats means two coats

A finish coat is engineered to perform at a specified film thickness. One heavy coat is not equivalent to two normal ones. It sags, it dries unevenly and it ends up thinner than intended in exactly the places that get the most weather.

Coverage claims on a tin assume an ideal surface. Real surfaces are rougher, more porous and more textured than the test panel, so the practical figure is always lower. Anyone quoting from the tin without looking at the wall is quoting a fiction.

What to ask about before work starts

A short list, and the answers tell you a great deal about how the job will go.

How is the surface being cleaned, and how long does it dry?

A specific answer means someone has thought about it. Vagueness here usually means a rinse and a start the same afternoon.

What is being primed, and why that choice?

The answer should be about this surface and its condition, not a general statement about the product.

What happens where paint meets bare substrate?

Listen for feathering, for spot priming, and for how repairs are being handled.

How many coats, and how long between them?

Recoat times are printed on the tin for a reason. Compressing them traps solvent and softens the final film.

The unglamorous conclusion

The finish coat is the part everyone sees and the smallest part of the work. Cleaning, scraping, repairing, sealing and priming is where the years of service are won or lost, and it is the stage that is easiest to shorten when a schedule slips.

If you are comparing quotes and one is noticeably cheaper, the difference is very rarely in the tin. It is almost always in the days before it was opened.
Read the full article

How to Get a Paint Scheme Approved on a Pasadena Historic District Street

How to Get a Paint Scheme Approved on a Pasadena Historic District Street

Most of the trouble owners run into with exterior color on a district street is not that their scheme was rejected. It is that nobody could tell from the submission what the scheme actually was. Three color names, no codes, no indication of which element gets which, and a photograph taken in flat light. That is not a proposal, it is a hint, and it goes back and forth for weeks.

The fix is not sophisticated. It is doing the color work as a real piece of work before you go anywhere near an application, and writing it down in a form somebody else can read. Here is how we do it, and what we have learned about which parts matter.

First, Find Out What Applies to Your Address

Before anything else, establish whether your house is actually in a district, and which kind.

There are meaningfully different situations. A property can sit inside a designated historic district, where the character of the streetscape is the point and exterior changes are reviewed against guidelines written for that area. It can sit under some form of landmark or overlay designation with its own rules. It can be individually designated while its neighbors are not. Or it can be an old house on an old street with no designation at all, in which case repainting is just repainting.

These are not interchangeable, and the requirements attached to each differ from city to city and often from district to district within the same city. So the first step is a phone call or a visit to your city’s planning counter with your address. Ask two things: what designation applies, and whether exterior paint color is something they review. That is a short conversation and it costs nothing.

We are deliberately not going to tell you what your answer will be, or how long anything takes, or what any of it costs. Those numbers vary and a painter who quotes them confidently is quoting from a different city or from nowhere. Ask the people whose job it is.

What we can tell you is what happens on our side of the fence, and that part is consistent.

What a Reviewer Is Generally Looking At

Where exterior color is reviewed, the question is usually about compatibility rather than a list. Does the scheme suit the building it is on, and does it sit comfortably in the street it belongs to.

That is a judgment, not a lookup, and it has a few practical consequences.

Compatibility with the building means the scheme respects how the architecture is organized. A Craftsman bungalow has a clear hierarchy: a body, a broad band of trim, the exposed rafter tails and beam ends under those deep overhangs, window sash, a porch with columns and a ceiling, and a front door that is allowed to be the loudest thing on the elevation. Greene and Greene influence runs through a lot of Pasadena and it pushed all of that toward earthy, low chroma colors with the woodwork celebrated rather than hidden. A scheme that paints out the rafter tails in the same color as the body erases the thing that makes the house what it is, and that reads as wrong even to somebody who could not explain why.

Spanish Revival is a different logic. The stucco body is doing nearly all the work, so the scheme lives in the relationship between one large field color and the small number of places where anything else is allowed: sash, wrought iron, a wooden door, a tiled step. Fewer colors, more care about the exact value of the big one.

Compatibility with the street means looking up and down the block before you commit. Not matching your neighbors, which produces a beige district, but knowing what range the street sits in and where your house lands in it.

Colors Need Codes, Not Just Names

Here is the most common reason a submission stalls, and the easiest to fix.

Manufacturer color names are not identifiers. Names are reused, retired, renamed and duplicated between brands, and two products with similar names can be visibly different. A submission that says the body will be a warm sage green is telling a reviewer almost nothing.

Every color in a documented scheme gets three things: the manufacturer, the product code, and the element it lands on. Body, trim, sash, rafter tails and beam ends, porch ceiling, front door, garage door if there is one. When it is written that way the scheme is unambiguous, it can be checked, and it can be reproduced years later when a piece of trim gets replaced.

It is also worth naming the sheen for each element, because sheen changes perceived color. The same base color in flat and in semi-gloss reads as two colors on a wall. Flat absorbs, hides surface irregularity and holds dirt. Eggshell and satin are where most body coats sit, washable without being glossy. Semi-gloss and gloss are for trim, sash and doors, where the edge should catch light and the surface should shed water.

Sample on the House, Not on a Chip

If there is one thing in this article worth acting on, it is this one.

A paint chip is small, held in your hand, indoors, against whatever else is in the room. It is a preview under conditions the house will never experience. Colors chosen that way go wrong on Pasadena elevations with real consistency, and always in the same directions.

Make boards instead. Rigid board, two coats, fully dry, at least a couple of feet across. Then hang them on the house itself and leave them there for several days.

Look at them at three times: early morning when the light is flat and cool, midday, and late afternoon when the sun comes in low and warm from the west. The inland light here is harsh and it is warm. It lifts every yellow and orange note in a color, so a soft sage arrives on the wall as a much more olive, more yellow green than the chip promised. It also flattens the subtle greys, which is why so many carefully chosen warm greys end up looking like nothing at all on the south elevation.

Then look under the eaves. Deep overhangs with exposed rafter tails are one of the defining features of the local housing stock, and they keep a wide band of wall in shade for the entire day. The same body color reads two shades darker and distinctly cooler up there. On a two color scheme that band is often the first thing a visitor sees from the sidewalk.

Test the trim color against the body color in both those conditions, at the boundary, not on separate walls. Contrast that looks crisp in the sun can disappear completely in the shade.

Evidence From the House Itself

Old houses keep their own records. Under a porch eave, on the sheltered face of a rafter tail, behind a downspout, inside a shutter hinge, there is usually coating that never got scraped back properly. Carefully sanding a small window down through the layers shows you the sequence, and often the original.

That is not binding on anything and it does not oblige you to reuse it. What it gives you is the single most useful reference point available: what somebody chose when the house was new, for a house that was designed to receive it. Even when the original is not to your taste, it tells you the value range and the level of contrast the elevation was built to carry, and that transfers to a modern palette without difficulty.

It takes about an hour and we do it on nearly every district job.

Practical Order of Operations

Put together, the sequence that avoids the back and forth looks like this.

Establish the designation and whether color is reviewed, from the city, with your address. Read the house and its elements, and sand a test window to see what is underneath. Read whatever guidance applies to your district. Narrow to two or three candidate schemes. Make boards and hang them, then look at them in three lights across several days and lose the ones that fail. Write the surviving scheme down with manufacturer, code, element and sheen. Only then submit anything, and only then buy paint.

The painting itself comes after all of that, and it is the part with the fewest surprises: wash, scrape, sand, repair, prime the bare areas with the right primer for the substrate, caulk the open joints, then two coats. Two, on a color change, regardless of what the can claims about coverage. One coat quotes on a color change come back as the old color grinning through the south wall a year and a half later.

When Not to Repaint

Worth saying, because it is the advice nobody in this trade volunteers. If the existing coating is sound, adhered, not chalking heavily and not failing at the joints, and you simply want a different color, then this is a want and not a need, and there is no harm in waiting until the color question is settled properly. A repaint done in a hurry on a scheme chosen from a chip is how houses end up repainted twice.

If you are on a district street in Pasadena and you are somewhere between an idea and a repaint, call (626) 554-4516 with the address. The first useful thing we can do is tell you which of these steps you actually need.

Read the full article

Bring Us the House and the Guidelines

If you are somewhere between an idea and a repaint, start with the color work. It is the cheap half, it is the half that decides how the finished house looks for the next decade, and on a district street it is the half that has to stand up to somebody else reading it. Call and tell us the address.